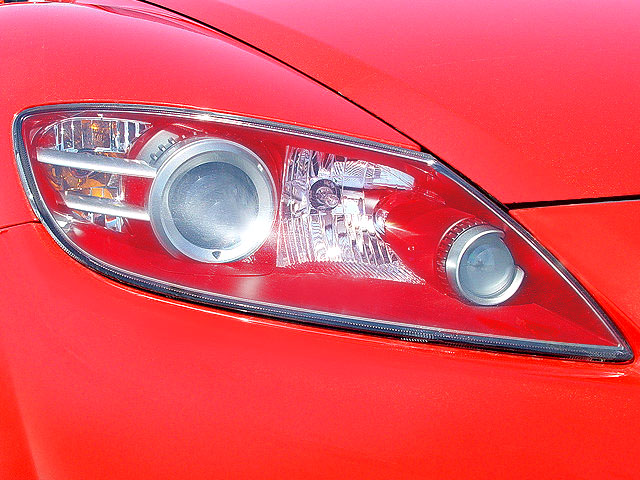
Your car’s headlights are not only essential for safe driving but also play a significant role in enhancing your vehicle’s appearance. Painting headlight housings is a cost-effective way to upgrade the look of your vehicle. It is a relatively easy job that can be completed with a few simple steps. With the right tools and a bit of patience, anyone can paint their headlights for a fresh, new look.
In this guide, we will provide you with an easy-to-follow step-by-step process on how to properly paint your headlight housings. We will cover the important safety precautions to take, the necessary tools and materials to use, and the technique to achieve the best results. Whether you are a professional or a beginner, our guide will enlighten you on the best way to paint headlight housings and make your vehicle look brand new again.
What kind of sealant to use on headlights?
When painting a headlight housing, it is important to use the right sealant. This is because a sealant provides a protective layer over the painted headlight housing, ensuring that no moisture or dirt can enter the housing and cause damage. There are several types of sealants available, including:
- Acrylic sealant: Acrylic sealants are the most commonly used sealants and are ideal for protecting headlight housings from scratching and other damage.
- Silicone sealant: Silicone sealants are also effective and provide excellent protection against moisture and dirt.
- Epoxy Sealants: Epoxy sealants are more durable than other sealants and are ideal for protecting headlight housings from extreme temperatures.
What paint do I use on the headlight housing?
Painting headlight housing is a great way to update the look of your vehicle and make it look like new! The first step is choosing the right paint to use on the headlight housing. Most automotive paints will work for this project, but some are better than others.
If you want a high-quality finish, look for paints that are specifically made for automotive applications. Choose a paint that is designed to resist fading and discoloration, as well as one that is easy to apply and offers superior coverage. Also, a good-quality primer should be used to ensure that the paint adheres properly.

How do I prepare my headlights for painting?
The process of painting your headlights involves more than just applying a coat of paint to the surface. Proper preparation is crucial to ensure that the paint adheres correctly and lasts longer. Here are the essential steps you need to follow to prepare your headlights for painting:
- Clean the headlights thoroughly with soap and water to remove all dirt and grime.
- Use sandpaper to rough up the surface of the headlights, creating a better surface for the paint to adhere to.
- Apply a coat of primer to the headlights to help the paint stick and prevent peeling or chipping.
- Apply a primer coat to the headlights to help the paint stick and prevent cracking or peeling.
- Apply a base coat of paint to the headlights, using spray paint designed specifically for plastic surfaces.
- Add a clear coat to protect the paint and provide a glossy finish.
- Finally, apply the paint to the headlights in thin coats, allowing each layer to dry completely before applying the next.
How do you seal a headlight house?
- Gather materials, including silicone sealant and a caulking gun.
- Remove the headlight housing from the vehicle and clean the housing and the lens thoroughly to ensure a proper seal.
- Apply silicone sealant around the perimeter of the headlight housing, ensuring full coverage.
- Smooth the sealant with a caulking tool to create a finished and professional look.
- Allow the sealant to cure for the recommended time.
- Reattach the lens to the housing.
- Reinstall the headlight housing onto the vehicle.
Precautions to observe while painting a headlight housing
Whether you are a DIY enthusiast or a beginner trying to paint your headlight housing, taking precautions is key when it comes to painting your vehicle headlights. Here are a few to keep in mind:
-
Use proper protective equipment, such as gloves and goggles.
- Work in a well-ventilated area to avoid inhaling fumes.
- Clean the headlight housing thoroughly before painting to get it free of any debris and ensure proper adhesion.
- Use a high-quality, heat-resistant paint designed specifically for use on automotive/headlights.
- Apply the paint in thin, even coats to prevent drips and ensure a smooth finish
- Allow sufficient drying time between coats and after the final coat before reattaching the housing.
Conclusion
Headlights are an essential part of any vehicle that helps to improve visibility and safety while driving. However, after several years of use, they can become cloudy, scratched, or even discolored, which can affect the overall look of your vehicle. If you are looking to give your vehicle a more polished and updated look, repainting the headlights can be a practical solution. Hopefully, this post has provided you with essential tips and tricks on how to prepare your headlights for painting, the steps you need to take and the tools and materials to use to ensure you achieve the best results.
Disclaimer
Hi, just letting you know that all products recommended here have been used by me, or are properly researched to ensure they are the best you are getting without bias.
I am also an affiliate for certain Amazon products and this means that some links here are affiliate links. If you purchase an item through any of them, I MAY earn a commission at no extra cost on you.