The headlight wire helps provide power to the headlights. One of the worst problems that can occur on a vehicle is when the headlight wires go bad. This is because riding at night can be dangerous when the headlight wires give out. This is why you need to learn how to fix headlight wire problems. We will address fixing the headlight wires in this post.

Fixing headlight wire problem
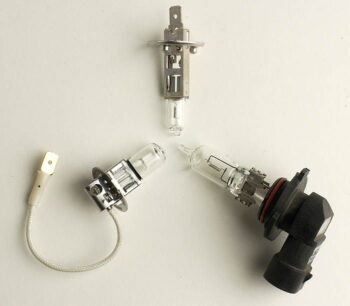
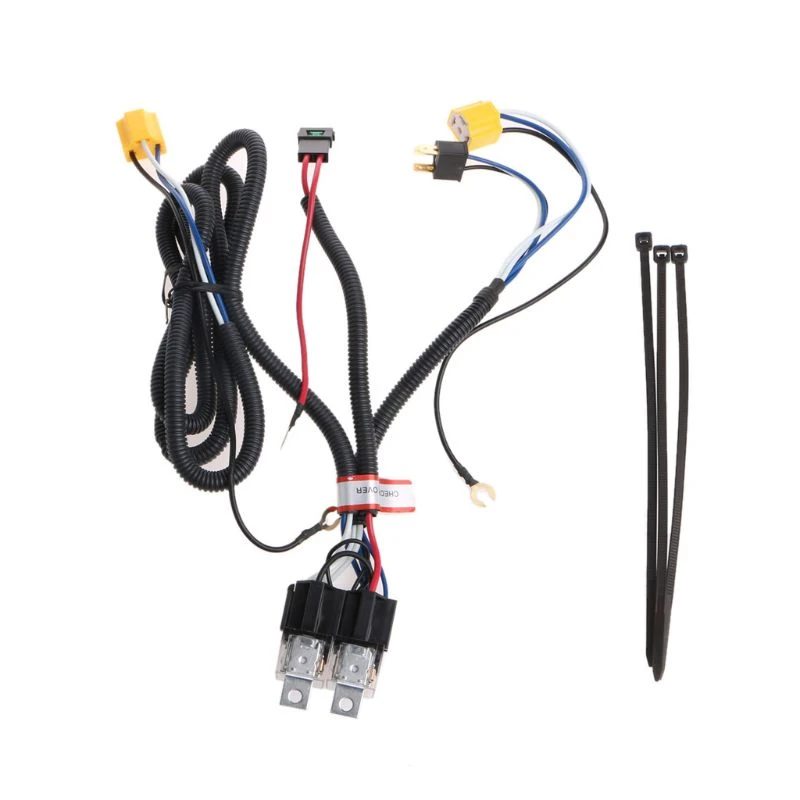
The headlight circuit of most vehicles features four different components which are: the headlight bulb, the wiring harness (which brings power to the headlight bulb) and the fuse (which protects the circuit from any abnormal or unexpected power surges). Damage to any of these will manifest as a failure of your headlight to work.
To repair any of these components, if they develop any fault, is easy and quick to execute according to the steps explained below:
Step 1
To ascertain which one of your headlights has any issues, turn them on first and then turn them off too. See which one is not functioning and then, open up the hood or bonnet with the hood support rod.
Step 2
Proceed to loosen the negative terminal nut of the battery using a crescent wrench and then lift the negative battery cable off its terminal.
Step 3
Disconnect the wiring harness on the rear of the headlights system and check to see whether the contacts are clean on the headlight socks and the wiring harness. Then look for any discolouration or corroding.
Step 4
Make sure that you brush the uppermost later of corrosion away, with preferably a pencil eraser before you then spread a dollop of dielectric grease on all the contacts for the wiring harness, to guard against any future susceptibility to erosion.
Next, plug the wiring harness back into the headlight sockets, before you replace the negative terminal of the battery. Thereafter, turn on the headlights again. Should they still fail to work, proceed with the next steps, but if they are fine, you should stop right at this stage.
Step 5
Initiate this step by first, opening up the car’s fuse box. Bring out the fuse that operates the car headlight circuit along with the headlight that is not working and check whether the fuse is blown.
Replace it, if it is blown, before you test the headlights again. If either of them does not still work, proceed with the next and final step again.
Step 6
In this stage, you must start by unplugging the headlight wiring harness from the non-functioning headlight and then connect the negative lead from the voltmeter to the negative terminal of the battery. Then, connect the positive terminal from the voltmeter to the positive wire on the headlight wiring harness.
The positive wire ought to have power running through it, verify whether that is so and if it is, replace the headlight bulb and turn it on again. If there is no power coming through the wiring harness, continue with the next step.
Step 7
Trace the wiring candles back to the fuse box while looking for any tears in their insulation. Should you find any, disconnect the negative battery cable promptly once again. Then, cut the cable at two places, just before and after the tears with a wire cutter.
Proceed to now connect each wire in the cable once again with the aid of a solder sleeve connector over one of the wires. Braid the exposed leads of the wires by connecting positive to positive and neutral to neutral.
Finally, slide the solder sleeve connector to melt the solder inside the solder sleeve connector before turning on the lights. They ought to work after this, all things being equal.
How do you check headlight wires by yourself?
You can always replace the harness that brings power to your headlight yourself. This harness connects to the base of the headlight bulb and also the power distribution centre in the engine cavity through the following simple steps:
Step 1
Turn off your engine and open the hood or bonnet.
Step 2
Loosen the negative battery terminal with a wrench and lift the battery negative cable off it and put it aside. After that, wrap the end in pairing tape to prevent accidental reconnection while working.
Step 3
Press inward on the side tabs of the headlight wiring harness on the rear portion of the headlights assembly, and also pull the wiring harness from the rear headlights assembly.
Step 4
With the aid of wire cutters, cut off the wiring harness of the two wires it is attached to.
Step 5
Strip off one inch of insulation at the end of the two wires that you cut the wiring harness from.
Step 6
You should then slide the solder sleeve connector over the wires from the last step.
Step 7
Again, strip off one inch of insulation from the two wires from your replacement wiring harness too.
Step 8
Braid together the positive lead of your replacement wiring harness wire using the lead from the positive wire of the wires in step 5. Also, braid the neutral lead of the replacement wiring harness using the lead from the neutral wire of the pair of wires in step 5.
Step 9
Finally, slide the solder connector over the braided naked positive leads and heat the connection using a heat gun in order to melt the solder connector and seal off the connection. Also, repeat the entire process for the neutral wire too.
Conclusion
Disclaimer
Hi, just letting you know that all products recommended here have been used by me, or are properly researched to ensure they are the best you are getting without bias.
I am also an affiliate for certain Amazon products and this means that some links here are affiliate links. If you purchase an item through any of them, I MAY earn a commission at no extra cost on you.